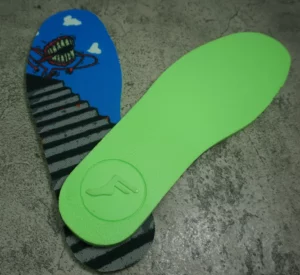
To clean shoe insoles, remove them from the footwear and scrub the surface using a mild soap solution and a soft brush. Avoid soaking the inserts in water or using a laundry machine, as these actions can ruin the shape and materials. Always let the insoles air dry completely on a flat surface away from direct heat.
Maintaining clean shoe insoles prevents bacteria growth, eliminates odors, and preserves the structural integrity of your footwear. Most removable inserts require manual cleaning rather than machine washing to prevent damage. Follow this InsoleWars guide to ensure your insoles remain in peak condition.
Can You Wash Shoe Insoles?
Yes, you can wash shoe insoles. However, the method depends on the material. Manual hand washing is the recommended approach for most brands. Avoid using a washing machine or a tumble dryer, as high heat and agitation can warp the shape or degrade the cushioning materials. Always allow them to air dry away from direct heat sources.
Preparation: Tools and Cleaning Supplies Needed
Gather these items before starting the cleaning process:
- Soft-bristled brush: An old toothbrush or a specialized suede brush.
- Mild detergent: Use a pH-neutral soap or a specialized footwear cleaner.
- Baking soda: For neutralizing deep-seated odors.
- Microfiber cloths: To wipe away moisture and dirt.
- Small bowl: To mix your cleaning solution.

Step-by-Step: The Correct Way to Clean Insoles (Hand Washing)
Follow these instructions to remove dirt and sweat without damaging the inserts:
- Remove and Dry-Brush: Take the insoles out of your shoes. Use your soft brush to scrub away dry dirt, dust, and debris from both sides.
- Prepare a Low-Moisture Cleaning Solution: Mix a few drops of mild soap with lukewarm water. Do not submerge the insoles in the water.
- Apply and Scrub: Dip your brush into the soapy water and shake off the excess. Gently scrub the surface of the insoles in circular motions. Focus on areas with visible staining.
- Wipe Down: Use a damp microfiber cloth to remove the soap residue. Ensure no soapy film remains on the material.
- Air Dry: Place the insoles on a flat surface in a well-ventilated area.

Material-Specific Cleaning Protocols
Different materials react differently to moisture and cleaning agents. Use the table below to choose the correct method for your specific type of insole.
| Insole Material | Recommended Cleaning Agent | Cleaning Method |
| Gel Insoles | Mild soap and water | Wipe with a damp cloth; avoid soaking the adhesive. |
| Memory Foam | Low-moisture foam cleaner | Spot clean only; foam absorbs water and takes a long time to dry. |
| Leather | Leather saddle soap | Use a damp cloth; apply leather conditioner after drying. |
| Cork | Water and white vinegar | Scrub gently; avoid saturating the porous cork material. |
| Carbon Fiber | Alcohol-based sanitizer | Wipe with a cloth to kill bacteria; no scrubbing needed. |
How to Get Smell Out of Insoles?
Persistent odors are caused by bacteria trapped in the fabric or foam. Use these techniques to freshen your inserts:
- Baking Soda Soak: Place your dry insoles in a sealed bag with a half-cup of baking soda. Shake the bag and leave it overnight. Shake off the powder the next morning.
- Vinegar Spray: Mix equal parts water and white distilled vinegar in a spray bottle. Lightly mist the insoles and allow them to dry. The vinegar scent disappears as it dries, taking the bad odors with it.
- UV Light: Using a UV shoe sanitizer kills 99.9% of bacteria and fungus without using chemicals or water.

The Drying Process: Why Heat is Your Insole’s Enemy?
Never use a hair dryer, radiator, or clothes dryer to speed up the drying process. High temperatures cause the following issues:
- Shrinkage: Foam and plastic components can shrink, making the insole too small for the shoe.
- Delamination: Heat breaks down the glue holding the fabric cover to the base.
- Cracking: Leather and cork become brittle and crack when exposed to artificial heat.

When to Replace vs. Clean Your Insoles
Cleaning helps, but all insoles have a limited lifespan. Monitor these signs to determine if you need new ones:
- Permanent Odor: If the smell remains after deep cleaning and deodorizing.
- Compression: When the foam feels thin or no longer provides arch support.
- Tearing: Visible cracks in the base or peeling fabric layers.
- Increased Pain: If you experience new foot or joint pain while wearing them.
Frequently Asked Questions (FAQs)
Q1. Can I put insoles in the washing machine?
Most manufacturers advise against it. The mechanical action can tear the fabric, and the soaking process can ruin the cushioning. Hand washing is the safer alternative.
Q2. How often should I clean my orthotics?
If you wear them daily, aim to clean them once every two weeks. If you exercise in them, clean them once a week to prevent sweat buildup.
Q3. Does rubbing alcohol damage shoe inserts?
Rubbing alcohol can be used on plastic or gel inserts for sanitization. Do not use it on leather or certain foams, as it can cause the material to dry out or crumble.
Q4. How do I clean insoles that are glued in?
Do not remove them. Use a damp cloth with mild soap to scrub the top surface while they are still inside the shoe. Use a dry towel to blot out as much moisture as possible and leave the shoes open to air dry.
Conclusion
Consistent maintenance keeps your footwear fresh and structurally sound. Following a manual cleaning routine removes bacteria and prevents the buildup of unpleasant scents. Proper care ensures the materials remain supportive for a longer duration. Always prioritize air drying to prevent damage from high temperatures. Adopting these habits preserves the comfort of your shoes and supports overall foot hygiene. Regular attention to your inserts prevents premature wear and maintains a sanitary environment for your feet. By sticking to these manual washing steps, you protect the integrity of the foam, gel, or leather components. This routine sustains the condition of your insoles and keeps your favorite pair of shoes in rotation for many miles.